1. Essentials
1.1. Folders
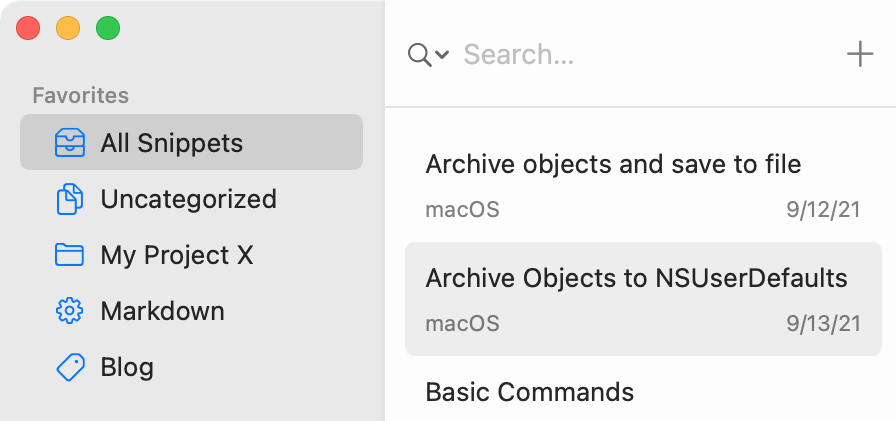
SnippetsLab enables you to create an unlimited number of nested folders to organize your library efficiently. Snippets not assigned to any folder will appear under “Uncategorized.”
To show or hide the sidebar: Choose View > Show Sidebar from the menu bar, or press Shift-Command-L.
To create a folder, you can:
Select Library > New Folder from the menu bar.
Click the
 button at the bottom-left of the sidebar, then choose New Folder.
Press Shift-Command-N.
To nest a folder within another folder, you can:
Drag and drop the folder onto another folder.
Hold Option while creating a new folder to create it directly as a nested folder.
To rename or delete a folder: Right-click on the folder and choose Rename or Delete.
Note: Deleting a folder will also remove all its subfolders, and any snippets in these folders will move to “Uncategorized.”
To set a custom folder icon: Right-click on the folder and choose Customize Icon….
SnippetsLab supports all icons from Apple’s SF Symbols library. You can browse commonly used icons through the in-app UI or search for any icon by its full name for direct use.
To sort folders alphabetically: Go to Settings > General and select Automatically sort folders and smart groups.
To set a default language for a folder: Refer to the section on Default Language.

Tip
By default, the snippets list displays all snippets in the selected folder and its subfolders. To exclude snippets from subfolders, right-click on the snippets list, expand Display Options, and deselect Include Snippets From Subfolders.
1.2. Tags
Tags provide an additional layer of organization in SnippetsLab, allowing you to associate multiple tags with a single snippet.
To set tags for a snippet, you can:
Click the
 button in the toolbar.
Click the
 button in the toolbar, then choose Show Tags.
Select Editor > Show Tags from the menu bar.
For snippets with existing tags, double-click the tags area in the snippets list.
The tags popover will suggest commonly used and appropriate tags for the current snippet. These suggestions evolve based on your usage of tags in the library.
To set a custom color for a tag: Right-click a tag in the sidebar and choose an option from Customize Color.
To rename or delete a tag: Right-click a tag in the sidebar and select Rename or Delete.
To change the sort order: Right-click a tag in the sidebar and choose the desired option in the Sort Tags By submenu. Tags can be sorted alphabetically or by snippet count. Additionally, you can choose to show tags with custom colors first by selecting the Color option.


By default, the snippets list displays all tags for each snippet. You can modify this in Settings > General > Snippets List > Show Tags to show only tags with custom colors or to hide tags from the snippets list.
Note
Tag names are case-insensitive but case-preserving. This means that while searching for or adding existing tags, you can use any capitalization, but the display format will match the original. For instance, if you create a tag named LaTeX, you can later search for or add it as latex, but it will always be displayed as LaTeX.
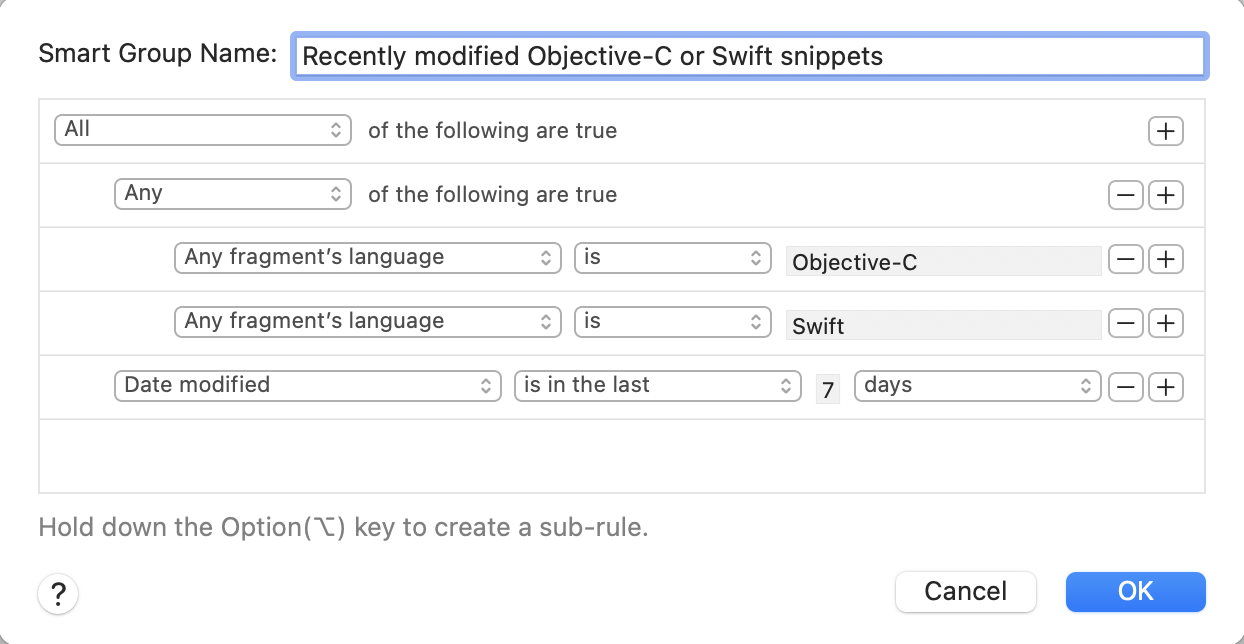
1.3. Smart Groups
Smart groups in SnippetsLab are a dynamic and powerful feature that allows you to search your library based on custom, complex criteria. With smart groups, you can display specific subsets of snippets that meet certain conditions, such as:
All snippets without any tags.
All snippets with multiple fragments.
All snippets in the Apple Development folder, plus any that have either the iOS or macOS tag.
All snippets modified within the last 7 days.
To create a smart group:
Select Library > New Smart Group from the menu bar, or press Control-Command-N.
Enter a name for your smart group.
Specify the rules you wish to apply.
To add a nested set of rules within a rule, hold the Option key and click the Nest button.
For more complex rules (e.g., some criteria matching all rules, others matching any), create sets of nested rules.
You can rename, modify, duplicate, or delete smart groups by right-clicking them and selecting the appropriate item from the context menu.
Set a custom icon for any smart group by choosing Customize Icon… from the context menu.
Here are a few examples of smart groups that you might find useful:
Recently modified: Show snippets modified within the last 7 days.
Untagged: Show snippets without any tags.
Attachments: Show snippets that have attachments.
By language: Show snippets in a specific language.
By project: Show snippets that belong to a specific project (e.g., filtered by specific folders and/or tags).
Smart groups are an exceptionally flexible tool that can enhance the organization and management of your snippets. Experiment with various smart groups to discover how they can boost your productivity.
1.4. Shortcuts
You can easily access your most frequently used folders, tags, and smart groups by adding them as shortcuts to the Favorites section in the sidebar. This feature provides quick and convenient access to your most important items.
To add a shortcut, you can:
Right-click on a folder, tag, or smart group and select Add to Favorites.
Simply drag and drop a folder, tag, or smart group into the Favorites section of the sidebar.
1.5. Languages
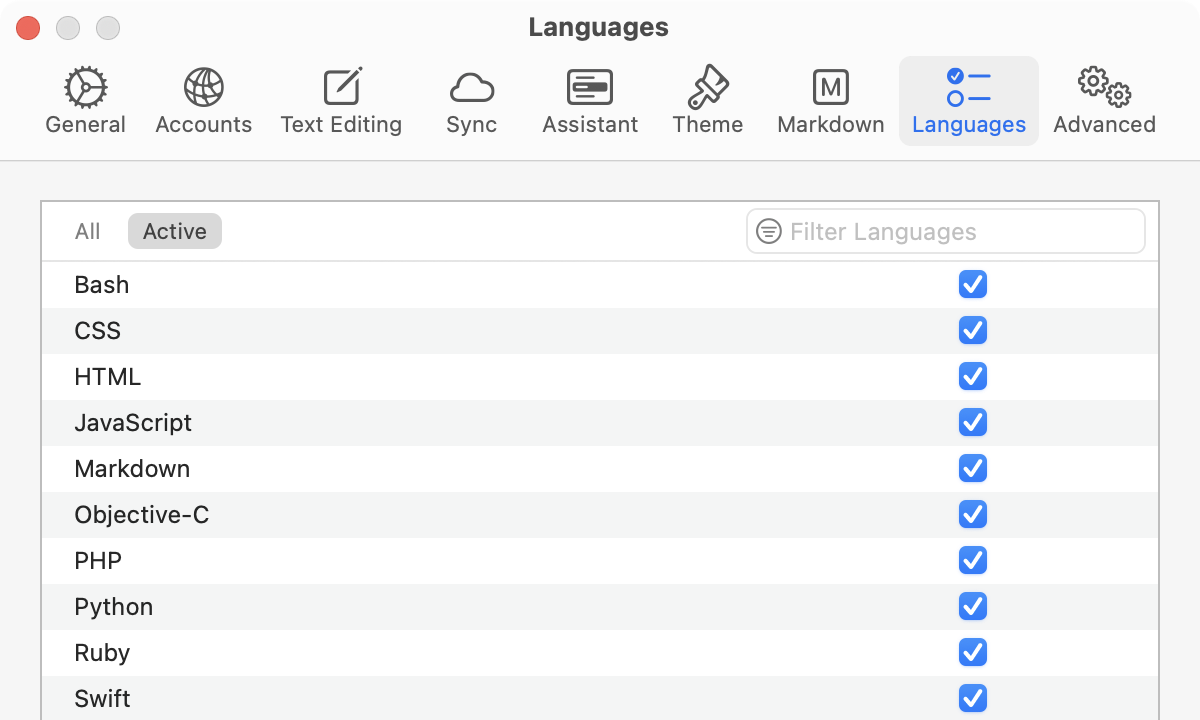
1.5.1. Active Languages
SnippetsLab supports a wide range of programming languages and text formats. To limit the length of the language menu, the app displays only active languages as selected by the user. Initially, the list of active languages includes only the most common languages. You should personalize this list to include the languages you frequently use.
To configure active languages, navigate to Settings > Languages. Here, you can activate a language by selecting its checkbox. Deactivating a language removes it from the language menu but does not affect any snippets that use the deactivated language.
1.5.2. Default Language
The application allows setting both an app-wide default language and individual default languages for each folder. New snippets will default to the folder’s language setting or, if none is set, to the app-wide default language.
To set an app-wide default language: Go to Settings > General and make your selection under Default Language.
To set a folder-specific default language: Right-click a folder and choose the desired language from the Default Language submenu.
Note: Only languages marked as active will appear in these menus.
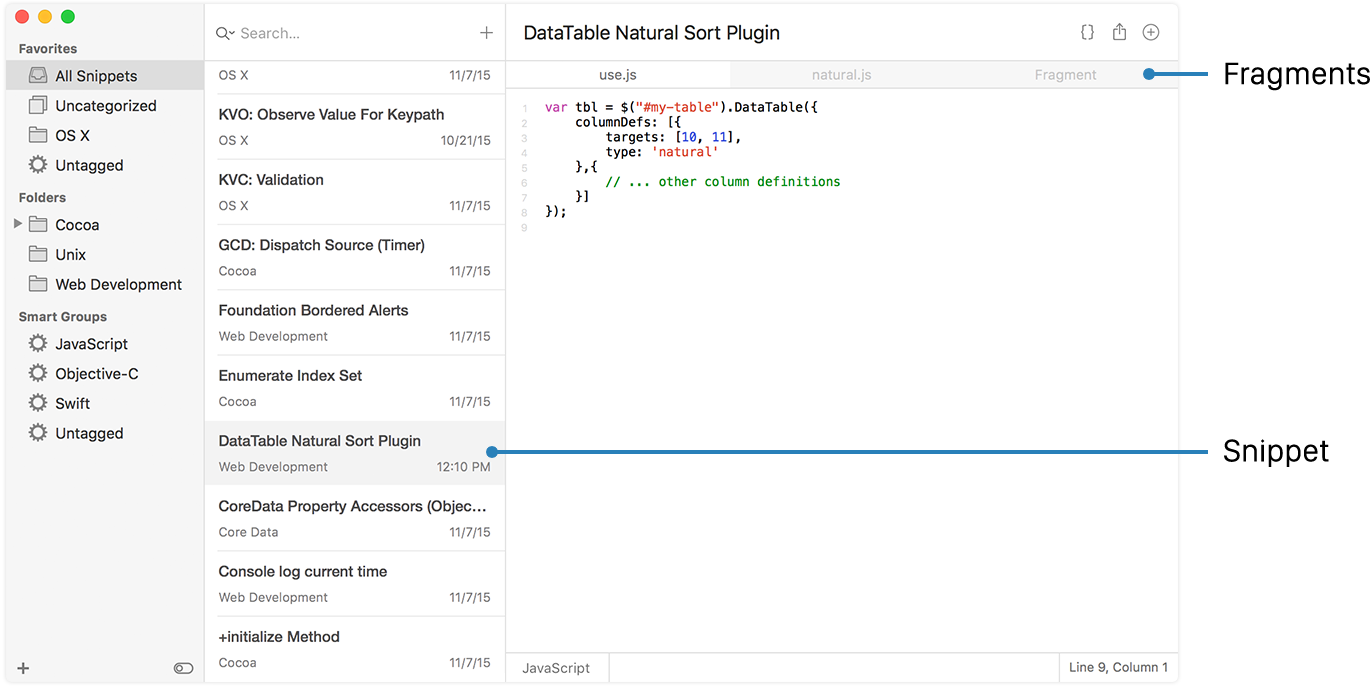
1.6. Snippets and Fragments
A snippet in SnippetsLab may contain multiple fragments, which are distinct parts of the snippet. Each fragment can have its own notes and language settings.
Fragments are useful when a snippet logically consists of several parts, particularly when these parts are in different languages. Common use cases include:
A class header and its implementation.
HTML code along with its JavaScript/CSS counterparts.
Various solutions to a single problem.
To pin a snippet, you can:
Swipe right from the snippets list and choose the Pin action.
Right-click and select Pin from the context menu.
To create a new fragment, you can:
Click the
button in the toolbar and choose New Fragment.Press Command-T.
Press Option-Command-T to create a fragment with the clipboard content.
To lock/unlock a snippet for editing, you can:
Right-click on the snippet and select (Un)Lock Editing.
Use the
 Lock/Unlock button in the toolbar (the button can be added by customizing the toolbar).
To rename/delete a fragment: Right-click the fragment tab and select an option from the context menu.
To reorder fragments, you can:
Right-click the fragment tab and choose Move to Right/Left.
Press Option-Shift-Command-[ or Option-Shift-Command-].

Tip
Quickly navigate to a specific fragment using Command-1 ~ Command-9.
1.7. Notes
Add notes to a fragment in the dedicated notes area for additional context. By default, notes will also appear in the snippets list, but will be excluded when you copy or paste the snippet content.
By default, the notes area is hidden if there are no notes.
To add notes, you can:
Click the
button in the toolbar and choose Add Notes.Select Editor > Add Notes from the menu bar.
To always show the notes area: Go to Settings > General and enable Always show notes field.
To add links: Choose Format > Link… from the menu bar or press Command-K.
To format text: Use the Format menu in the menu bar. For quick access to common formatting options, add the Format button to the toolbar.

1.8. Attachments
SnippetsLab allows you to attach files to snippets for added context, such as screenshots, sample data, or configuration files. Attachments must be under 100 MB.
To add an attachment, you can:
Click the
button in the toolbar and choose Add Attachments….Select Editor > Add Attachments… from the menu bar.
Drag and drop files into the snippet area.
Paste images and files directly into the editor.
To activate Quick Look: Double-click on an attachment or press Space while selected. Note that Quick Look may not be available for all file types.
To manage attachments: Right-click for options like open, rename, delete, or save a copy.
To insert image attachments into Markdown snippets: Drag an attachment into the editor or right-click and choose Insert as Markdown Link.
To automatically optimize images: Navigate to Settings > General and select Save optimized copies when importing images.
The optimization can often reduce image file size considerably with limited-to-minimal impact on visual quality.
Tip
Create a smart group to display all snippets with attachments.
1.9. Code Formatting
SnippetsLab uses technologies such as clang-format and Prettier for built-in code formatting in various languages.
To format a snippet, you can:
Choose Edit > Format Code from the menu bar.
Press Control-Command-\.
Use the
 Format Code button in the toolbar (the button can be added by customizing the toolbar).
To format automatically: Navigate to Settings > Text Editing and enable Automatically format code when pasting.

1.10. Searching
SnippetsLab offers advanced searching capabilities. To switch key focus to the main search bar from anywhere in the app, press Shift-Command-F.
1.10.1. Search Filters
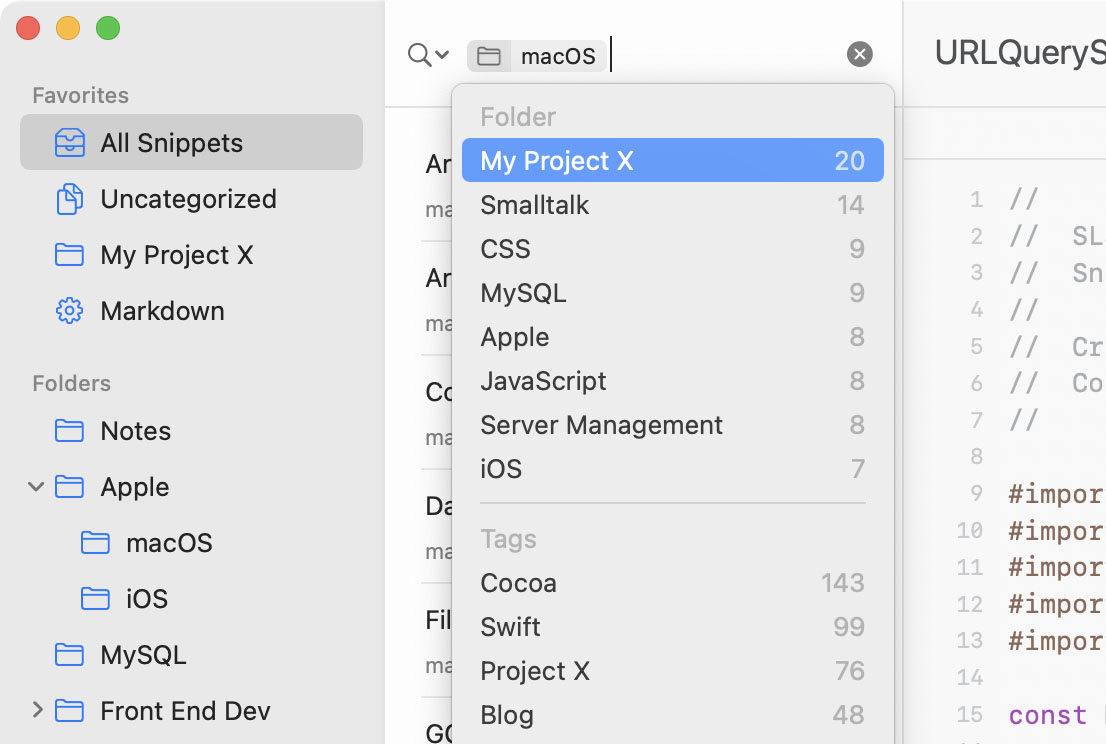
Search filters allow you to limit your search results to specific folders, tags, and languages. There are a few ways to insert a search filter:
Type the keyword
in:in the search bar.Click the
 button and select Insert Filter.
Press Option-Esc.
With the search filter menu open, continue typing to narrow down the choices. You can combine multiple filters to show only snippets that satisfy all criteria.
To quickly navigate to an intended item in the filter menu, press Command-Up or Command-Down to jump to the top or bottom of the list, and Option-Up or Option-Down to jump to the previous or next section.
By default, the search filter menu closes automatically after making a selection. To keep it open, hold Option.
1.10.2. Search Options and Advanced Syntax
Click the  button to access additional options, including full-text search, fuzzy search, case sensitivity, result ranking, and more.
In non-fuzzy search, SnippetsLab performs whole-word matches by default but also supports advanced queries using special syntax, including Boolean, prefix, suffix, substring, phrase, and more. You can combine multiple query types within a single search. For example, the following query will return snippets containing words that start with “foo” or words that end with “bar”:
foo* OR *bar
Below is a list of all supported operators:
Operator |
Description |
|---|---|
|
Boolean AND |
|
Boolean AND |
|
Boolean inclusive OR |
|
Boolean NOT |
|
Begin/end logical grouping |
|
Wildcard for prefix and suffix search; ignored in phrase searching. |
|
Delimiter for phrase searching |
The Boolean NOT operator can also be used for logical exclusion. For example, the query foo NOT bar will return snippets containing foo but not bar.
Note: Unary Boolean operators (e.g., NOT bar) are not supported, so such queries will not return any results.